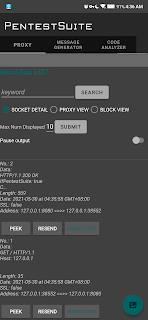
Proxy function is one of main functions in PentestSuite. Once started, it will start two kinds of action:
Server
Address
You should first specify the address the server will be started on.
Normally it will be automatically assigned by the value: 0.0.0.0:8080. This value will make sure that the server will listen to the port 8080 of every network interface.
Note: only one server is on, so normal server behavior and proxy server behavior will be contained by the same server.
SSL Parser
Note: only premium version of PentestSuite has this feature.
Now you can also get it through PentestSuite Community version by one month subscription.
Introduction
Turn it on and PentestSuite will be able to capture MOST* traffic ciphered with SSL/TLS.
* Not any traffic can be captured since some client software
1 don't trust system certificate (if you're trying to capture the traffic of apps) and
2 use some custom ways to check certificate and even other information provided by server.
Ways to setup certificate and intercept traffic generated from internal browser
Step 1: Turn on server with SSL Parser checked
Step 2: Access the server with the address specified in PentestSuite by any browsers you like
Click Certificate generation.
Step 3: Generate and download the certificate
Default settings has been given and you can directly click Generate.
You should now be able to see a file has been downloaded. Make sure its name is end with '.cer', change suffix if that's not the case.
After that, you can normally open the file directly and you will see the picture in the next step. But sometimes you won't be so lucky to trigger this process.
My favorite way is to open it through file manager. But you could also install it from Android system settings, there's a place like this to install certificate. Some device will not work by directly open it, but this method should work.
Normally you can find it by search 'certificate' in your system settings search blank.
Here's where it should be.
Step 4: Install the certificate
Give it a name you like and click OK.
Step 5: Generate internal browser instance
Next time you open PentestSuite, directly start the server and generate internal browser instance will return to the state where former steps has been done in this section. It's because the generated certificate will be saved in your Android device storage.
Ways to intercept traffic generated from your device(s)
Make sure you have installed certificate into your device. If you have not installed, just follow the steps described in the section Ways to setup certificate and intercept traffic generated from internal browser.
Go to System settings and set the proxy settings in WiFi settings.
Note: You might see some SSL error messages pop into your sight. It's because this proxy settings method will make a lot of apps and services will use the proxy server and not all of them accept the certificate provided by PentestSuite.
The following steps is a wrong action, please don't follow it.
Step 1: Turn on server with SSL Parser checked
Step 2: Generate the internal browser instance and start surfing the internet/Go to System settings and set the proxy settings in WiFi settings.
These steps will make you see enormous error messages regarding to SSL/TLS.
Ways to intercept traffic generated from PC browser
In this section, we use Firefox to be the client software waiting to be intercepted and use Microsoft Edge 91.0.864.41 to access web interface.
Step 1: Turn on server with SSL Parser checked
Step 2: Access the server with the address specified in PentestSuite by any browsers you like
Click Certificate generation.
Step 3: Generate and download the certificate
Default settings has been given and you can directly click Generate.
Now you should be able to see the traffic captured by PentestSuite from the client software(Firefox).
Message blocker
This is used to intercept messages that flows through the server. With this switch on, you will be able to intercept any messages. PentestSuite currently divide messages into two types:
HTTP server behavior
This will block messages that represents the bytes to flow through server with the target that directly contact with our server. For example, when you directly access the address http://127.0.0.1:8080 using browser.
Proxy behavior
This will block messages that represents the bytes to flow through server with the target that using our server as a proxy, or we can say the data is not intended for our server.
Message replacer
This feature is used to automatically replace some content in the bytes data that flows through our server.
Message list
The data that flows through the server will be recorded in this list.
It divide the data into three types.
Socket detail
It contains two types of data described in Message blocker: Proxy message and normal message.
Proxy view
It contains only proxy messages.
Block view
It contains only the messages that are going to be sent while not because intercepted by PentestSuite.
Search
You can directly input the string that you want to search in the message list. And you will notice that Switch 'pause output' will be checked. Uncheck it to refresh the list.
Number of displayed
Directly input the number of messages that you want the message list to display.
Note: don't input a number that's too large, your phone might not be able to display massive number of message.
Peek
Click this button to see the message in detail. It will not do anything that might hurt the state of the server.
Resend
Click this button and you will see this message is directly send to Message Generator. Every details wil be set up well.
Highlight
Click this button and you will see this message will be highlighted.
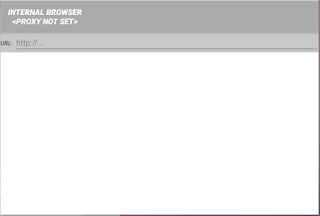
Internal browser
Internal browser can be generated as many as you want. Please turn on the server before generate it. Its proxy settings will be automatically set up to our server.
Once you have not turned on the server and generate an internal browser, you will get notice that says, proxy not set.


Comments
Post a Comment